Assigned: Monday, October 21
Due: Tuesday, October 29, 2019 by 11:55pm
Read this entire document before beginning the project.
You should follow the guidelines for commenting your code set forth in earlier projects.
The picture files your program will process are regular text files that contain a sequence of (x, y) coordinates. The picture is created by drawing lines between pairs of consecutive (x, y) coordinates, following the commands given in the file that describe how the lines should be drawn.
Each line of the file contains exactly one command, of which there are four different types:
canvas: This command specifies the size of the drawing canvas
that should be used. This command is guaranteed to always
be the first line of the file and will never appear anywhere else.
lineto: ("Line to") This command specifies to draw a solid line to the next set of coordinates.
dlineto: ("Dotted line to") This command specifies to draw a dotted line to the next set of coordinates.
jumpto: ("Jump to") This command specifies to move to the next set of coordinates without drawing a line at all. This command is guaranteed to always be the second line of the file (the first real command after opening the canvas), but it may appear elsewhere as well.
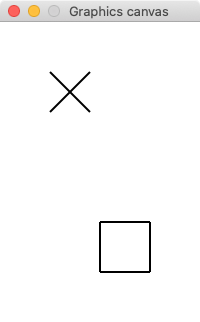
As an example, say you are reading the file picture1.txt, which contains the following commands:
canvas 200 300
jumpto 50 50
lineto 90 90
jumpto 50 90
lineto 90 50
jumpto 100 200
lineto 100 250
lineto 150 250
lineto 150 200
lineto 100 200
In order, these commands tell us to:
The final result is that we see the following picture:
You can see how after the canvas command, the following four commands draw the "X" and the last four commands draw the square.
You do not need to draw an entire shape at once. By reading the file line-by-line and using the sliding window technique, you should be able to draw lines between the "previous point" and the "current point" by using draw_line from the simplegraphics library.
I recommend using set_line_thickness(2) to make the lines a bit
thicker and easier to see.
Drawing dotted lines requires a little more work than solid lines because the simplegraphics library does not have a built-in function for drawing a dotted line. To do this, you will define a function called draw_dotted_line that works similarly to the built-in function draw_line. Here's a description of how to do it.
cs1graphics.py and simplegraphics.py files from the class website if you need fresh copies of them, and save the files to a folder on your computer that you'll remember.yourLastName_yourFirstName_prg6.py in the same folder as the cs1graphics.py and simplegraphics.py files.draw_dotted_line function as described via the link in the previous section. I recommend writing this all in one file and just commenting out the test cases when you're done.main() function, write code to:
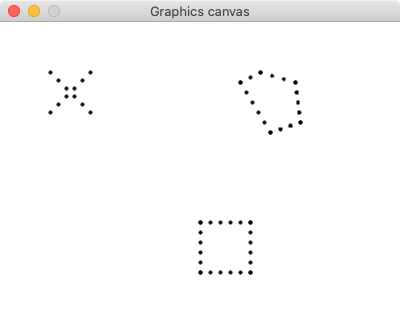
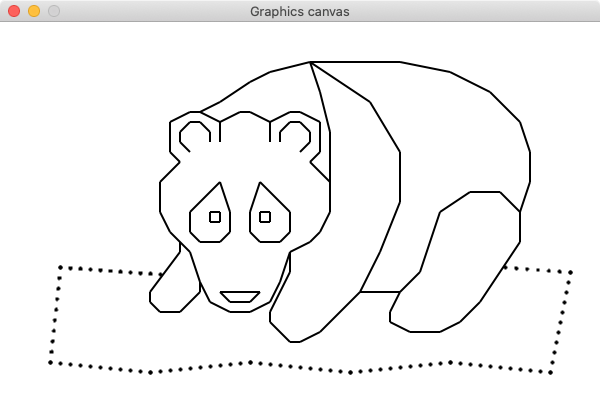
draw_line and draw_dotted_line to draw the appropriate picture.You should test your program with each of the following files to make sure they draw the pictures correctly. Click on each file to download them.
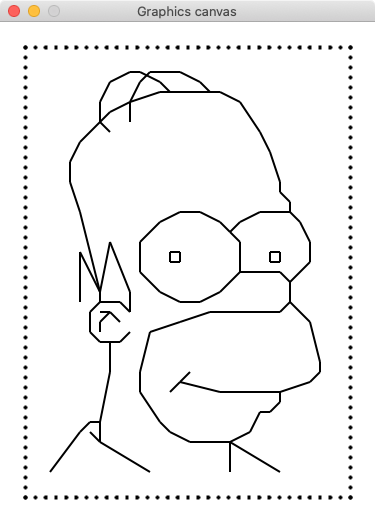
picture1.txt [ output ] picture2.txt [ output ]homer.txt [ output ]panda.txt [ output ]lynx.txt [ output ]What the user types is in bold. The bracketed comments describe what the program is doing behind the scenes, and are not part of the output.
Run 1:
What file do you want to read? picture1.txt
[ program opens window and draws picture ]
Click the canvas to close the window and end the program.
[ user clicks the canvas and the program ends ]
Run 2:
What file do you want to read? homer.txt
[ program opens window and draws picture ]
Click the canvas to close the window and end the program.
[ user clicks the canvas and the program ends ]Don't try to write the entire program all at once. Break it down into pieces that build on each other. For instance, first write the draw_dotted_line function as described. Then write a program that just reads in a file of commands and prints (to the screen) the name of the command and the (x, y) coordinates as they are read.
Don't forget to convert the x- and y-coordinates to integers (separately).
How do I handle the jumpto command? There is, of course, no
"jump to" command in the graphics library. However, you will still have to "remember" the (x, y) coordinates given in the command because
the following command will probably be a line-drawing command. If you are using the sliding window technique correctly, then you don't need to really do anything special when you encounter this command.
My lines are too thin. Try calling set_line_thickness(2) right after you open the canvas.
Let the user enter two numbers (a, b) that the drawn image will be shifted by. The image will be shifted "a" pixels in the x direction, and "b" pixels in the y direction.
Let the user enter a scaling factor for the drawing. For instance, if the user enters a scaling factor of 2, the picture should be drawn twice as big. If they enter 0.5, it should be drawn 50% smaller.
Let the user enter a number of degrees the image should be rotated. For instance, if the user enters 15, the image should be rotated 15 degrees clockwise.
Use your knowledge of file writing (see zybook section 12.2) to create a program where the user can create a connect-the-dots drawing on the screen by clicking points, and the program will save the drawing to a file similar to the ones your regular program reads.
Your program will be graded on correctness, as well as on coding style, which refers to choices you make when writing your code, such as good use of variable names, appropriate indentation,
and comments (this is not an exhaustive list). See the syllabus for further grading details.
You will receive one bonus point for every complete day your program is turned in early, up to a maximum of five points. For instance, if your program is due on September 20 at 11:59pm, if you turn in your code on Moodle any time on September 19 from 12:00am through 11:59pm, you will receive one extra point on your project. Programs submitted on September 18 from 12:00am through 11:59pm will receive two points. This pattern continues for up to five points.